
Maintaining your balance while snowboarding is one of the most important skills you can learn.
It’s what keeps you from falling down and ruining your day on the slopes.
Learning to balance on a snowboard is not difficult, but it does take some practice.
Start with the basics, then learn intermediate techniques that will allow you to ride any slope with confidence.
[ez-toc]
How do I keep my balance while snowboarding?
The first thing you’ll want to do is get your snowboard, boots, and bindings properly fitted.
You’re going to be spending a lot of time on the slopes, so make sure that everything fits as best as possible. A boot that is too tight or too loose can cause all kinds of problems with balance and comfort.
Once everything’s dialed in, it’s time to hit the slopes and practice!
We break down the basics into four easy steps: getting on and off the board, standing up on the board, turning, and falling. So let’s get started:
Step 1: Getting On/Off The Board
When climbing onto your snowboard it’s important not to grab your toe edge to pull yourself up.
You’ll want to lift from the nose or tail of your board with a quick, snapping motion.
With your back to the mountain and your front pointing down, grab your toe edge with both hands and give it a slight kick.
This will send your board out from under you; now quickly lean back and turn as you grab the nose or tail of your snowboard with both hands as it comes up.
Step 2: Standing Up On The Board
Once you’ve kicked off and landed on your board, stand up and bend your knees slightly.
Push down on your heels to make sure they’re locked into the bindings.
Make sure your feet are spread apart with one foot turned slightly inward for better balance (your heel side foot should be at a 45-degree angle).
Your front foot will naturally point forward, but make sure that you don’t have all of your weight on your toes, causing them to cramp.
Now that you’re up, make sure your weight is centered over the middle of the board.
Your knees should be relaxed and bent with your lower leg perpendicular to your upper leg for better balance.
Step 3: Turning
You’ve got the basics down pat – now it’s time to turn!
When turning, there are two phases that are important to keep in mind: carving and edging.
Carving is when your snowboard makes a crescent shape as you cut across the slope of the mountain underneath you.
Edging is when you have one edge of your snowboard dug into the snow so that it acts as a rudder of sorts.
This allows you to turn on a dime while maintaining speed.
Before you start carving, make sure that your feet are parallel to each other.
If one foot is in front of the other, your board will veer off in that direction when you turn.
Begin the turn by looking where you want to go (this gets easier with practice!) and shifting all of your weight onto your heel side edge while leaning in the same direction.
As soon as you feel the snowboard move beneath your feet, return the weight back to the middle.
Your snowboard should cut into the slope with ease, allowing you to carve circles around obstacles on slalom courses or ski lifts on more advanced slopes.
Step 4: Falling
Now that you’ve mastered the basics, it’s time to fall. No one is immune to falling on a snowboard – even professional snowboarders experience falls every once in a while!
When you fall, remember these tips:
When falling forward, put your hands behind you and follow through with your head and body.
This will ensure that you cover up and protect yourself from injury.
Make sure to get back onto your feet as soon as possible so that other people don’t run into you when they’re trying to ride down the mountain.
If falling backward, bring your arms and knees in and roll up into a ball just like when you were learning how to do a somersault in physical education class back in elementary school.
This will help you protect your head and body by tucking them into a ball.
If you find yourself tumbling down the mountain, try to land on the flat part of your snowboard so that you don’t put too much stress on your knees or tailbone.
Use a balance board to practice
Perfect your skills before you hit the slopes.
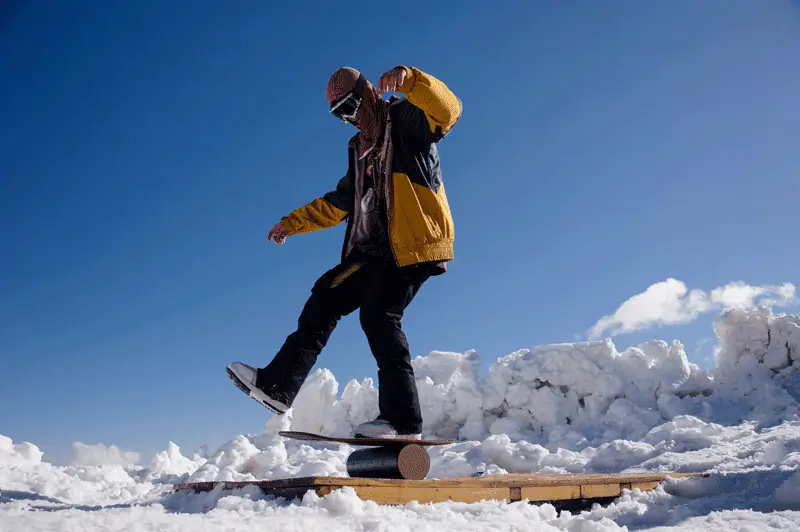
The first thing that you should do to become a better snowboarder is practice using a balance board.
A balance board is basically a wooden, flat platform with three round cutouts on top of it: one at each end and one in the middle.
It’s used by people who want to improve their balancing skills for other sports or just as a fun activity to do on weekends or after work in your home.
Your balance will improve as well as the strength and flexibility of your lower body when you use this equipment regularly because it adds resistance and helps develop muscle memory that can be carried over into snowboarding.
How to use a balance board
Using a balance board is also quite simple: just stand on top of it, shifting your weight from side to side so that you always have one foot planted firmly on the ground and the other balancing on a single cutout in the middle of the board.
It’s kind of like balancing a book on your head! When you’re good at doing that, try standing on your hands or even your hands and feet simultaneously to challenge yourself even more.
You should practice this exercise for about 20 minutes each time you use it – after all, it’s better to take your time and make sure that you perfect your balance than to rush it and end up hurting yourself.
Before you know it, you’ll be ready to take on the slopes with your newfound snowboarding skills!
Remember: keep your core muscles engaged as much as possible (especially when carving) by pulling your belly button toward the back of your spine.
This will help you easily turn from side to side without losing momentum or speed.
Benefits of balance board exercises for snowboarding
The major benefit is practicing in your home, working the muscles, and balance that will carry over to the slopes.
You will also develop muscle memory and coordination which will carry over into snowboarding and can improve your agility – always helpful in this sport!
Remember: if you want to improve your skills and become a better snowboarder, training is essential.
You’ll learn how to do tricks more easily because of improved balance, lower extremity strength, coordination, cardiovascular endurance, power output, etc.
All this combined with increased confidence will take away one big fear from many people
Snowboarding is hard work – you’re constantly using your legs to move back and forth, turning from side to side, bending, extending, and flexing them as you ride down the mountain.
Your core muscles are also engaged in order to help counterbalance your movements so that you don’t fall over when going from edge to edge when carving turns on a slalom course or snowboard park.
Building up these muscles through balance board exercises will give you the physical fitness necessary to snowboard with ease – no falls for you!
Snowboarding exercises for balance boards
These exercises will mimic the movements you make when snowboarding and help tone your muscles at the same time:
Warming up first!
It’s always best to warm up with a 5-10 minute walk before doing any type of exercise – this will get your blood flowing and help improve circulation.
Balancing on the board also helps strengthen the muscles in your feet, calves, thighs, hips, back, shoulders, etc.
Always start out gently to make sure that you don’t hurt yourself.
Gradually increase the difficulty as needed.
Remember safety first!
Back-and-forth
This is the easiest, but you can also try balancing on one foot or performing a knee tuck.
Trying out different types of exercises will help you to find the one that suits you best and is most effective for your snowboarding. Familiarise yourself with it so you can perform it without thinking about what to do. Stay relaxed and let the balance come naturally so you don’t have to think too hard about it when sliding downhill.
Quick recap:
To stay balanced, shift your weight from side to side by moving your feet in small steps while standing on one leg or two, keep arms loose at sides for support, relax shoulders and ankles. When shifting stance during turns, follow an arc that corresponds with the shape of the turn.
Side-to-side
What about rotating my board 90 degrees so it stands parallel to the roller?
If you want to practice the 50/50 trick, this is what we recommend.
Your weight will be distributed across both of your feet under more pressure than when standing with the board turned at an angle or placed perpendicularly because now all of its surface areas will support your weight.
As well as it will help you improve balance even further–and it will require even more work to maintain.
If you’d like, try balancing on one leg or performing a knee tuck.
Maintaining your balance will be much harder now, but it could prove beneficial.
Stay relaxed and let the balance come naturally so you don’t have to think too hard about it when sliding downhill.
Balancing on one foot
Sure, it’s possible.
But you can try balancing on one foot or performing a knee tuck, too.
We recommend practicing this way first if your balance isn’t perfect yet.
You don’t need to stand with your legs together; that will only make the exercise more difficult for you and won’t bring any added benefit.
If necessary, keep moving your feet in small steps to maintain balance when lifting one leg off the ground.
This movement is really important for riding! It helps improve leg muscle strength and overall balance and coordination enormously.
Squatting/Squats
Try performing a squat while standing on a balance board or a BOSU ball.
This is the most common exercise for strengthening leg muscles and developing balance.
You can perform a regular squat with feet at a shoulder-width apart level, or try balancing on one foot when in the low position.
Quick recap: To stay balanced, shift your weight from side to side by moving your feet in small steps while standing on one leg or two, keep arms loose at sides for support, relax shoulders and ankles. When shifting stance during turns, follow an arc that corresponds with the shape of the turn.
Jumps
This is the last and most difficult exercise we’d like to recommend.
It will help you adjust your body balance while performing a motion. This could be similar when you’re landing a jump or landing on a rail.
If it feels too hard for you at first, take time to practice the previous movements before moving on to this one.
You can also slow down gradually in order not to lose your balance when jumping off of the board.
Standing with both feet together may be easier for this exercise because all your weight will be supported by one foot only, which is something that happens during jumps in snowboarding as well.
Perform 3 sets of 10 reps each for this exercise
Quick recap:
To stay balanced, shift your weight from side to side by moving your feet in small steps while standing on one leg or two, keep arms loose at sides for support, relax shoulders and ankles. When shifting stance during turns, follow an arc that corresponds with the shape of the turn.
Which balance board to choose?
If you want to step up the challenge, check out our article on the best balance boards for snowboarding.
Balance boards are simple tools with only one singular goal – to help us maintain proper balance while performing various exercises.
Some people believe that using balance boards “makes us better snowboarders” (which may be true), but this isn’t their main purpose.
The main reasons to use balance boards are:
- improve body control,
- improve coordination skills.
- Improve your balance
- Improve agility
- Improve muscle memory
- Improve static endurance
- Strengthen muscles and joints
- Improve tricks
Balance boards are great to use at home and in the off-season. Keep your balance and skills sharp over the winter and surprise people next snowboard season.
Final Thoughts
The exercises that are recommended with the use of a balance board can help you improve your body control, coordination skills, and muscle memory.
These benefits will come in handy when it is time to ride on snowboard ramps and rails.
People who do not know how to properly balance themselves while riding will have a hard time progressing in the sport of snowboarding; but with practice, things become easier and more comfortable.
The exercises described here are good for beginners because they don’t require much skill or knowledge beforehand.
You can start practicing them right away!
Some other tricks that may help you improve your balance include: looking ahead when performing movements, riding at low speed (especially when starting out), imagining yourself standing on a narrow board, etc.
You can also try adding some dynamic exercises to your practice routine next time you go snowboarding – running uphill, jumping down stair sets either forward or backward, executing 360s, etc., all while balancing on a board.
Have fun!

